
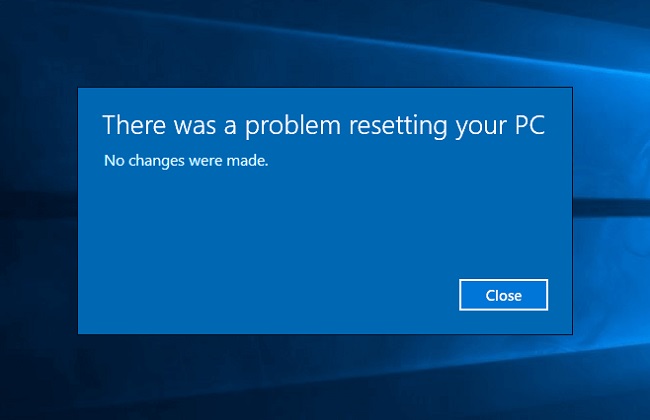
Many times it has been complained by many Windows users that their PC is failing to Reset and instead of the error message “There was a problem resetting your PC” is displayed on a blue screen and below it has been informed that no changes were made.
But after this happens the users fail miserably to boot in the Windows system.
Resetting your PC can be a helpful solution for various Windows issues, but what happens when you encounter the error message “There Was A Problem Resetting Your PC” in Windows 10?
Read Also:
- WMI Provider Host High CPU
- Unable To Initialize Steam API
- Windows Can’t Communicate With The Device or Resource
In this article, we will explore the meaning of this error, identify common causes, and provide solutions to help you overcome this roadblock. Additionally, we will discuss how to force a PC reset in cases where the standard reset process fails.
What Does “There Was A Problem Resetting Your PC” Mean?
The error message “There Was A Problem Resetting Your PC” appears when Windows 10 encounters an issue while attempting to reset your computer to its factory settings. This error can disrupt the reset process and leave your system in an undesirable state.
Causes of “There Was A Problem Resetting Your PC” in Windows 10
Common Causes of the Error: This error can occur due to various reasons, including:
- Corrupted system files.
- Hardware issues.
- Third-party software conflicts.
- Insufficient disk space.
- Malware or viruses.
- Unsuccessful Windows updates.
How to Fix There Was A Problem Resetting your PC Error
Solution 1 — Repair Install Windows 10
It might happen that none of the above-mentioned methods to repair the issue work for you, in that case, the only solution you are left with is to Repair install Windows. If even that doesn’t work then you can try to Install Windows completely from scratch.
When this happens you should understand that the problem with your PC is not HDD related but related to your operating system or the BDC on the HDD was erased by mistake.
The mentioned steps for the methods are easy to conduct and can be performed yourself. Although if you come to face any constraints while following the mentioned steps then it is advisable to consult someone with more technical knowledge.
Solution 2 — Recover From Drive
If you try this method then you might lose all of your personal files. So, try this method at serious consideration.
1. Plugin the USB recovery drive you have.
2. Now Restart your PC.
3. When a prompt message appears on the screen, press any key to continue.
4. Then select the language of your preference.
5. Look for the Repair option at the bottom left corner of the screen and click on it.
6. After that select the option Troubleshoot.
7. Then you should click on the Advanced Option.
8. Now click on the System Image Recovery option from the advanced options window.
9. And then do as instructed on the screen to complete the process.
Solution 3 — Run System File Checker (SFC) and Check Disk (CHKDSK)
1. To start, insert the bootable disk for Windows 10.
2. Now Restart your PC.
3. When a prompt message appears on the screen, press any key to continue.
4. Then select the language of your preference.
5. Look for the Repair option at the bottom left corner of the screen and click on it.
6. After that select the option Troubleshoot.
7. Then you should click on the Advanced Option.
8. Now click on Command Prompt option from the advanced options window.
9. And then type the following commands hitting enter in between each one.
sfc /scannow /offbootdir=c:\ /offwindir=c:\windows
chkdsk C: /f /r /x
10. At last Restart your PC after exiting the cmd.
Solution 4 — Run Startup/Automatic Repair
1. Start with inserting the bootable disk for Windows 10.
2. Now Restart your PC.
3. When a prompt message appears on the screen, press any key to continue.
4. Then select the language of your preference.
5. Look for the Repair option at the bottom left corner of the screen and click on it.
6. After that select the option Troubleshoot.
7. Then you should click on the Advanced Option.
8. Now click on the Automatic Repair option from the advanced options window.
9. Wait for the Automatic Repair process to complete.
10. Restart your PC.
This will most likely solve the issue but if you are still having the same problem then try the other mentioned methods.
Solution 5 — Fix Boot Image And Rebuild BCD
1. To start, insert the bootable disk for Windows 10 and now Restart your PC.
2. When a prompt message appears on the screen, press any key to continue.
3. Then select the language of your preference.
4. Look for the Repair option at the bottom left corner of the screen and click on it.
5. After that select the option Troubleshoot.
6. Then you should click on the Advanced Option.
7. Now click on Command Prompt option from the advanced options window.
8. And then type the following commands hitting enter in between each one.
bootrec.exe /FixMbr
bootrec.exe /FixBoot
bootrec.exe /RebuildBcd
9. If the above commands don’t work then you can the following commands instead
bcdedit /export C:\BCD_Backup
c:
cd boot
attrib bcd -s -h -r
ren c:\boot\bcd bcd.old
bootrec /RebuildBcd
11. At last Restart your PC after exiting the cmd.
Solution 6 — Perform a System Restore
1. To start, insert the bootable disk for Windows 10.
2. Now Restart your PC.
3. When a prompt message appears on the screen, press any key to continue.
4. Then select the language of your preference.
5. Look for the Repair option at the bottom left corner of the screen and click on it.
6. After that select the option Troubleshoot.
7. Then you should click on the Advanced Option.
8. Click on the System Restore option.
9. Now do as instructed on the screen to complete the process of restoring.
10. Finally Restart your computer and check whether you are getting the same error message while Resetting your PC or not.
Solution 7 — Rename the System and Software Registry Hives
1. To start, insert the bootable disk for Windows 10.
2. Now Restart your PC.
3. When a prompt message appears on the screen, press any key to continue.
4. Then select the language of your preference.
5. Look for the Repair option at the bottom left corner of the screen and click on it.
6. After that select the option Troubleshoot
7. Then you should click on the Advanced Option
8. Now click on Command Prompt option from the advanced options window
9. And then type the following commands hitting enter in between each one
cd %windir%\system32\config
ren system system.001
ren software software.001
10. Now the Windows Recovery Environment window will open as soon as you exit cmd
11. Finally to boot your PC click on the Continue option and this will most likely fix the There was a problem resetting your PC error
Solution 8 — Recover your PC Using Recovery USB
1. Start with plugging the USB recovery drive you have.
2. In the cmd and type in Notepad and hit Enter.
3. Go to Open option on the File menu.
4. Look for the USB recovery drive you are using for the booting process.
5. Type in the letter of the drive, for example, F or G. Hit Enter.
6. After that type in Setup and again hit the Enter.
7. The Windows Installation window will open now.
8. Do as instructed on the screen to reinstall Windows.
Restart the PC after the process is completed to make sure the There was a problem resetting your PC error is fixed.
How to Resolve “There Was A Problem Resetting Your PC”
Solutions to Overcome the Error:
- Run the Windows Update Troubleshooter to address potential update issues.
- Use the SFC (System File Checker) tool to scan and repair corrupted system files.
- Check your hard drive for errors using the CHKDSK utility.
- Uninstall or update any recently installed third-party software that might be causing conflicts.
- Ensure your PC has enough free disk space to complete the reset.
- Scan your system for malware and viruses with reputable antivirus software.
- If all else fails, consider a repair or reinstallation of Windows 10.
Forcing a PC Reset
When to Force a PC Reset: Forcing a PC reset should be considered only as a last resort when all standard reset methods have failed, and you need to restore your system to a clean state.
How to Force a PC Reset:
- Backup important data and files.
- Create a Windows 10 installation USB or DVD.
- Boot your computer from the installation media.
- Follow the on-screen prompts to initiate a clean installation of Windows 10.
- During the installation process, choose to keep no files or applications to perform a clean reset.
Read Also:
The End
One of the above-mentioned methods should be enough to fix There was a problem resetting your PC error. If not so then you should definitely consult an expert or lodge a complaint with Microsoft.
Encountering the “There Was A Problem Resetting Your PC” error in Windows 10 can be frustrating, but it is not an insurmountable obstacle. By identifying and addressing the underlying causes, such as corrupted system files, hardware issues, or software conflicts, you can often successfully reset your PC.
However, in cases where standard reset methods fail, forcing a PC reset through a clean Windows 10 installation can provide a fresh start for your system. Remember to back up your important data and files before attempting any reset procedure to prevent data loss and ensure a smooth recovery process.